How To Make Resin Coasters DIY At Home With Easy Steps
Making your own functional and elegant household items is a fulfilling endeavor. In this blog post, we look at the thrilling world of making epoxy coasters from the comfort of your own home. Resin coasters are practical homewares and superb canvases for your creative mind. Whether you’re an experienced crafter or seeking how to make resin coasters for beginners, we will walk you through each step of the process. You will learn how to gather the correct materials and master the process of pouring and curing the resin. We are experts at creating high-quality resin coasters and we’d love you to join us on this journey to create your own personalized epoxy coasters at home.

Key Takeaways
- Follow the step-by-step process in this post for a clean and durable finish for your home-made resin coasters.
- Make sure you gather all your materials before starting.
- Always work in a well-ventilated area and use safety goggles and gloves.
- You can embed decorative elements in your resin and even use pigment to color it.
- Epoxy resin makes an excellent material for DIY coaster making.
Table of contents
-
How To Make Epoxy Resin Coasters: Step-by-Step Guide
-
Using Resin Coaster Molds With Built-In Temperature Resistance
-
Supplies You Need For Making Resin Coasters
-
How To Prepare Your Workspace Before Making Resin Coasters
-
What Kind Of Epoxy Resin Do You Use For Coasters?
-
Does Epoxy Resin Make Good Coasters?
-
Do Resin Coasters Need To Be Sealed?
-
How Long After Mixing The Resin Will It Then Begin To Harden?
-
How Can I Thin Out The Epoxy Resin Mixture?
How To Make Epoxy Resin Coasters: Step-by-Step Guide
There is a very specific process for creating DIY epoxy coasters. But first, what is a resin coaster? It’s a drink coaster made by pouring resin into a mold and allowing it to harden. To make them, you must have silicone molds prepared and a resin mixture ready to pour. You should also choose any decorative elements you wish to set inside the resin, and then proceed with the process of combining everything within the molds.
The process is quite slow and complex. It can be rewarding to do it yourself but, if you want professional results in a short timeframe, you can use our service to have beautiful custom coasters made for you in any quantity. Read on for the full, step-by-step guide.

Cleaning And Prepping The Silicone Molds
The first step in making a resin coaster at home is to have silicone molds that will serve as the basis for the resin coasters. There are many places to look for these molds, including:
- Craft stores
- Online marketplaces
- Specialist resin suppliers
- Craft fairs
The silicone molds come in various shapes and sizes. While round molds are a typical choice for making circular coasters, there are many square coaster design ideas if you want to go for a different shape.
Once you have chosen your molds and have them in your possession, you need to ensure they are clean. Inspect them for dust, debris, or residue and soak them in warm water containing mild dish soap. A soft brush can be used to scrub them, but be gentle, and ensure they are completely dry before proceeding to the next step.
Making The Resin Mixture
You should prepare your mixture in a well-ventilated area and wear gloves and eye goggles for maximum protection. Whatever resin you have bought, be sure to read the manufacturer’s safety instructions. There are small risks to working with epoxy resin, and you can avoid them completely by ordering yours from us.
Mix the resin like this:
- Gather your materials: Your kit should contain an epoxy resin and hardener, mixing cups and mixing sticks.
- Measure your ratio: Follow the manufacturer instructions to get the right ratio of resin to hardener.
- Mix it: Using a clean mixing cup, pour the resin component first. Then add the hardener and stir gently for the length of time the manufacturer recommends.
Your resin should now be ready and you can move on to the next stage of making your DIY epoxy coasters.
Adding Colors And Decorative Elements
If you intend to color the resin, you should have some pigment at the ready. This can be mixed into the resin once it is prepared. It’s a great way to further customize the aesthetic, which is why we offer a range of color options for our personalized coasters, helping you match them more closely to the decor in your space.
Many people choose to add decorative elements to their resin coasters. Popular choices include:
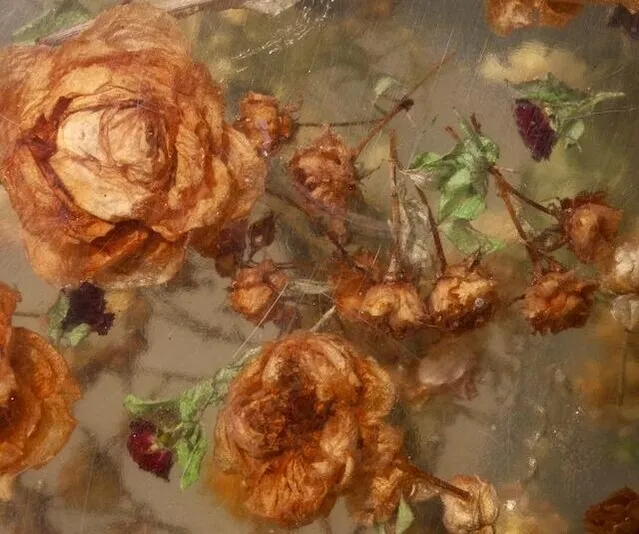
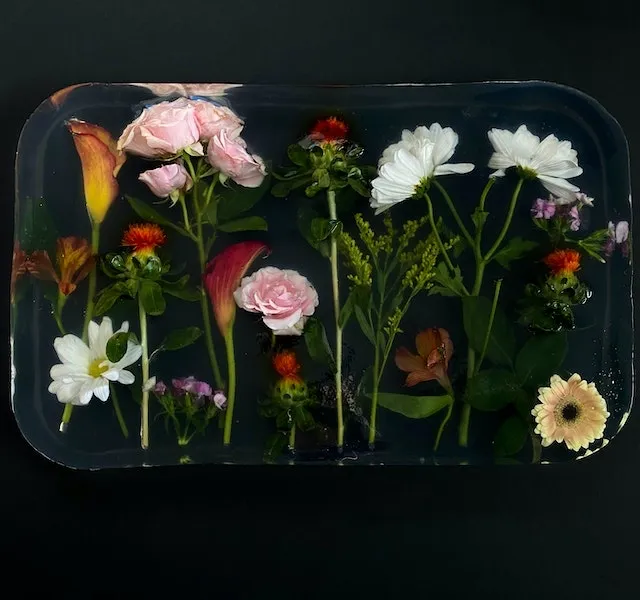
- Dried flowers
- Leaves
- Gold flakes
- Shells
- Alcohol ink
If you plan to incorporate decorative elements to make your resin coaster, the typical approach is to suspend them in the resin. This starts with pouring a thin layer of resin as the base, so let's move on to the next step.
Pouring The Resin Into The Mold
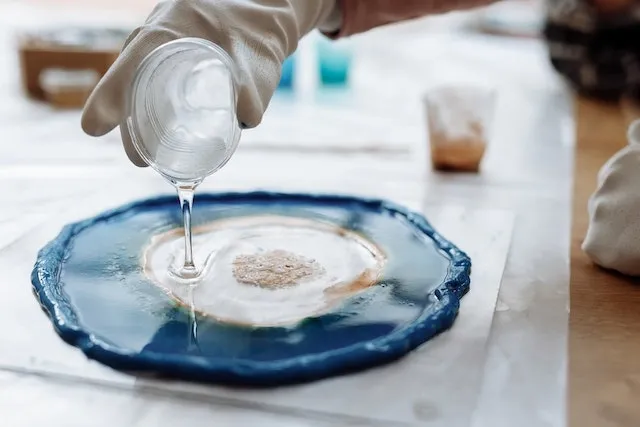
Place your silicone coaster mold on a flat surface. Gently pour your mixed resin into the mold, creating a thin layer at the base with a depth of around 5mm. You can then place your decorative elements on top of this. Some people choose to simply position their decorative elements at the bottom, while others simply don’t use them at all. There are many coaster design ideas for DIY creations.
Once your decorative items are in place, pour resin to cover them completely and fill the mold. If you are adding glitter, you may wish to do it in stages to ensure even distribution throughout the coaster. Getting the aesthetic right for your vision is key to resin coaster making, and we take all the stress and worry off your hands with our expert craftsmanship so you can experience superb results every time.
Removing Bubbles And Achieving A Smooth Finish
There are a few methods for removing bubbles from the resin. It is often best to do this before pouring the resin into the mold, but it can be done at a later stage as well. Here are your options for achieving a smoother finish when making epoxy coasters:
- Use a heat gun: On its lowest setting, apply heat from a heat gun over the surface of the resin, moving in a slow, sweeping motion to make visible bubbles rise to the surface and disappear.
- Use a pin: With a very fine pin, poke bubbles to break them and enable them to rise to the surface.
- Vibrate the mold: You can gently tap or vibrate the mold on a tabletop, encouraging the bubbles to rise to the top.
Again, this work should be done in a well-ventilated area, and be warned that using a heat torch risks scorching the resin. If you order from us, none of this is your concern, as we have the technology to reliably remove bubbles from the resin for flawless print-on-demand coasters.
Curing Process
Curing is, essentially, the process of allowing the resin to dry. In our resin coaster instructions, we wish to emphasize that you must follow the manufacturer's guidelines for certain things. We already mentioned this for getting the correct ratio of resin to hardener, but it is equally important for curing.
Typically, the curing process for epoxy resin takes around 24-72 hours, so check your manufacturer's instructions and place your molds somewhere appropriate to allow the curing to happen.
Unmolding And Finishing Touches
Once the resin is fully cured, you can remove it carefully from the silicone mold. It is important that you confirm that the resin has hardened completely before you do this, so check it thoroughly. You can then gently remove it from the mold with your hand, making sure not to damage either the coaster or the silicone mold.
You now have your completed coaster. It may even take a few more days to completely finish curing, but it is out of the mold. You must learn to maintain it, and knowing how to clean drink coasters is a key part of that.
If you want to sidestep all this hard work and even get a bulk quantity of matching resin coasters, design your own coaster with us. We even provide detailed instructions on maintaining them for your convenience.
Using Resin Coaster Molds With Built-In Temperature Resistance
Resin crafting is a popular and evolving practice, and many new silicone molds are now manufactured with built-in heat resistance up to 500°F. These advanced molds help ensure a more even cure and reduce the risk of warping during the curing process.
For best results, opt for professional-grade, temperature-rated molds when you make resin coasters at home. These are especially beneficial if you plan to use the coasters with hot beverages, as they maintain their structural integrity and surface smoothness better under heat exposure.
Look for molds labelled “heat-resistant” or “high-temp silicone” when you are buying and be sure to compare options.
Create photo coasters with epoxy resin
Our custom resin coasters can have your cherished photos encased within for a personalized design that features a professional finish to protect your surfaces in style.
Supplies You Need For Making Resin Coasters
You will need the following materials for your project:
- An epoxy resin kit
- A mixing cup and sticks
- Silicone molds
- A heat gun (optional)
- Pins (optional)
- Color pigment (optional)
- Decorative elements (optional)

How To Prepare Your Workspace Before Making Resin Coasters
Your workspace plays a crucial role in the process of how to make resin coasters. Dust and debris pose a significant risk to the aesthetics of your coaster, as they can mar the resin's finish. Therefore, it is essential to work in a clean, dust-free environment.
Additionally, you should be mindful of the fumes emitted by epoxy resin in its liquid state. These fumes can:
- Irritate the eyes, nose, and throat
- Lead to dizziness
- Bring about nausea
- Cause headaches
To mitigate this risk, it's imperative to work in a well-ventilated area and wear protective gloves and goggles.
Lastly, it's best practice to have all your resin coaster supplies set up before you begin. This ensures that everything you need is readily available as you progress through the process, allowing for a smoother and more efficient workflow.
Want a coastal design on your customized resin coasters?
Work with us to add seaside design elements to your custom resin coasters and capture the spirit of the beach, whether for your home decor or a seafront bar or restaurant.
Start hereWhat Kind Of Epoxy Resin Do You Use For Coasters?
The best resin for making coasters is typically referred to as 'clear casting' or 'art grade' epoxy resin. It provides a crystal-clear finish, making it ideal for creating decorative items. This is the type of epoxy resin we use when crafting our resin coasters, ensuring the use of the highest-grade materials.
When exploring your options, look for the following features:
- UV resistance
- Low odor
- Self-leveling
- Bubble release
- Curing time
- FDA compliance
Make sure to choose a resin that meets your needs in all of these aspects. Remember what coasters are used for: they serve the dual purpose of protecting your tabletops and furniture while adding a decorative element to your space. To achieve the best results and durability, your choice of resin plays a significant role.
Does Epoxy Resin Make Good Coasters?
Epoxy resin is a highly favored material for crafting custom coasters, and it comes with a multitude of advantages, including:
- Durability: Epoxy resin excels in its resistance to wear and tear.
- Aesthetics: Its glossy, glass-like finish adds an impressive touch, with the added benefit of various customization options.
- Customization: Resin's versatility allows you to embed decorative elements and mold it into your desired shapes.
- Protection: Resin coasters are waterproof and heat-resistant, providing superb protection for your tabletops.
In summary, epoxy resin is a reliable, versatile, and aesthetically pleasing choice for DIY coaster crafting, making it one of our most sought-after materials for creating elegant designs tailored to our customers' creative vision.
Eco-Friendly Resin Options Now Available
In response to increasing environmental awareness, a number of manufacturers now offer bio-based or non-toxic epoxy resin kits crafted from renewable sources. These alternatives still provide superb clarity and durability but with fewer harsh chemicals and a reduced carbon footprint.
When searching for materials in 2025 and beyond, consider opting for eco-resins. These will typically be labelled as any of the following:
- BPA-free
- Low-VOC
- Plant-based
These options are ideal for hobbyists who are concerned about things like indoor air quality, sustainability, and safer crafting with kids or pets nearby.
Mimic the look of resin coasters with luxurious glass
Our custom personalized glass coasters are a delightful alternative to resin coasters, adding your unique designs to the glass material without any of the hassle of DIY customization.
Do Resin Coasters Need To Be Sealed?
Epoxy resin creates a glossy and protective finish, so it isn't necessarily required to seal it. However, you can choose to seal it if desired, and there are a few potential benefits:
- Enhanced durability
- Stain prevention
- Preservation of the aesthetic
The decision of whether to include a sealing step in your resin coaster how-to is entirely up to you. If you opt to do so, ensure you use a compatible, high-quality sealer and apply it following the manufacturer's instructions.
How Long After Mixing The Resin Will It Then Begin To Harden?
Epoxy resin typically has a "pot life," which is the time you have to work with it after mixing. This pot life can vary between manufacturers, so your resin may start to harden within a few minutes or up to an hour or more. To determine the exact pot life for your product, be sure to consult the manufacturer's instructions.
Following the pot life, the resin enters the curing phase, during which it hardens. A complete cure usually takes 24-72 hours, so it's essential to work efficiently. If making epoxy coasters feels overwhelming, you can simplify the process by ordering your desired quantity of resin coasters from us, customized to your unique design preferences.

Want to enjoy the personalized look without the DIY hassle?
Our custom cork coasters are a natural, sustainable alternative that you can have professionally manufactured. Add your custom design and optional epoxy coating for flair.
Create yoursHow Can I Thin Out The Epoxy Resin Mixture?
It is possible to thin out your epoxy resin mixture, but exercise caution when doing so. While it can make pouring resin for making epoxy coasters more manageable, altering the resin-to-hardener ratio or using epoxy resin thinners may impact the resin's curing and performance.
If you plan to adjust the ratio or incorporate a thinner, consider conducting a test with a small resin sample to ensure you achieve the desired viscosity without compromising the resin's quality.
Frequently Asked Questions About How To Make Resin Coasters
What Kind Of Epoxy Resin Do You Use For Coasters?
Look for ‘clear casting’ or ‘art grade’ resin that meets your needs for epoxy coaster making.
Does Epoxy Resin Make Good Coasters?
Absolutely! It has an elegant, glossy finish and it offers superb durability and protection against both heat and spills.
How Long After Mixing The Resin Will It Then Begin To Harden?
This depends on your resin, so check the manufacturer instructions to learn the “pot life” and “curing time”.