How To Make Car Coasters
Car coasters are a small yet powerful addition to your vehicle. They can enhance your personal sense of style within the vehicle whilst serving an important practical purpose. In this post, we will walk you through the process of how to make a car coaster. Whether you’re someone who just loves finding new crafting projects or you want to add a personalized touch to your vehicle cup holders, this guide is here to help you create these handy little accessories. So, without further ado, let’s delve into the world of DIY car coasters to help you elevate the aesthetics and functionality of your car.

Key Takeaways
- Your design is all-important, particularly if you are ordering custom car coasters to be professionally made using sublimation printing.
- Layered designs work very well to get a great aesthetic with sublimation.
- You can also make car coasters yourself from a range of materials.
- Epoxy resin is a popular DIY car coaster material, and we have provided a guide on how to do it.
How To Make DIY Car Coasters
You have two choices for how to make car coasters. You can explore some DIY coaster ideas and make your own, or you can design one on our website and leave the crafting up to us. With the second option, you get premium-quality coasters with many customization options made precisely to your specification.
But, if you are determined to take the DIY car coaster approach, the process is quite simple. You must choose a design, including a material for your coaster, then go about bringing it to life and ensuring you have the optimal size. Let’s look at the process in more detail.

Pick A Design
It is fun and creative to choose your design for a DIY car coaster project. There are many things to consider in selecting your design, so here are some suggestions:
- Style preferences: Your style, and the look of your car’s interior, should guide your design choices. Do you go for a classic, modern, or whimsical type of aesthetic? Your coaster design should complement your preferences.
- Color coordination: Make sure you coordinate the coaster colors with your vehicle’s interior. This will help create a cohesive look, or you could choose contrasting colors to make a statement.
- Themes: You are choosing the custom aesthetic as you explore how to make car coasters, so pick a theme that resonates with you. Whether you like nature, music, abstract art, or anything else, choose a theme that will lead to a unique look. And consider the custom design elements that you could incorporate into it.
- Durability: Practical considerations are very important here. Choose your materials based on durability and suitability for the purpose. It should be easy to maintain and resistant to wear and tear.
- Size and shape: It is crucial to get the dimensions right so that the coasters can fit in your car’s cup holders.
These are all fundamental considerations for your project. If you find the process daunting, you can always rely on our service to create beautiful custom car coasters without the DIY effort.
Layering For Sublimation
Sublimation is a printing and heat transfer process often used in creating custom coasters. We use it in our manufacturing processes, and there are ways you can take advantage of it in your custom project. To succeed, you must consider layering your design to achieve color depth, detail, and precise separation of the colors.
Here’s how to use layering when creating your custom coaster design to get the best results with the process:
- Use design software: Professional design tools include features for using layers to give you precise control over your design elements. Use them to create your design before you upload it to us.
- Incorporate separate elements as layers: Include images, text, patterns, and other graphics as separate layers in your design.
- Organize the layers: Use the layers to keep all the design elements separate and lay them out in accordance with one another. This will help you adjust them and display them as you wish them to appear on the coaster.
- Use transparency: Make certain elements translucent using transparency settings to create pleasing visual effects like blending or fading.
- Color adjustments: You can adjust the colors in each layer as required. Be sure to use the software’s preview mode to check the interactions between layers.
Applying sublimation inks to a coaster requires specialist equipment, and that’s how to make a car coaster that truly shines. Layering is important for creating your design to take full advantage of what our sublimation techniques can do. If you need assistance with your design, our team is available to help you make the best custom coasters possible.
Sublimation Process
Sublimation is an advanced process for how to make car coasters. It is known for its versatility and its ability to transfer vibrant, long-lasting designs onto various coaster materials. This technique relies on specialized inks that, when heated, transform into a gas, creating a permanent, full-color image that won't fade over time. The process can be summarized as follows:
- Design Preparation: Begin by creating a digital design using graphic design software. This design is then printed onto sublimation transfer paper using specialized sublimation inks.
- Heat Press Transfer: The printed transfer paper is carefully applied to the coaster surface. A heat press machine is used to evenly distribute heat and pressure, causing the inks to transform into gas and penetrate the coaster's surface.
- Color Permanence: The sublimated inks re-solidify within the coaster material, becoming an integral and permanent part of the coaster. This results in a design with vibrant colors and exceptional accuracy that will never fade or peel.
Sublimation is the preferred method for applying custom designs to car coasters because it offers durability and ensures that the artwork remains vivid and long-lasting. Come to us for custom print-on-demand coasters created to the highest standards.
The Finishing Touches
Once the sublimation process is complete, a clear, protective finish is often applied to the printed surface. The specific type depends on the manufacturer, but the purpose is threefold:
- Protection: This additional layer helps prevent wear and tear and increases the products resistance to scratches, moisture, and fading.
- Durability: The finish means the coaster is likely to have greater longevity, preserving the integrity of the sublimated design as well as the coaster’s surface.
- Aesthetics: The finish provides a smooth, glossy surface that complements the coaster’s general aesthetic.
The choice of finish affects the look, feel, and durability of the coaster. When you consider what coasters are used for, it’s important that they are durable and robust, so the finish is an important consideration in how to make car coasters that last.

Supplies Needed For Making Car Coasters
If you are planning to design custom car coasters to be crafted by us, you'll need to prepare your design. If you intend to utilize our sublimation process, we recommend following the design method described earlier. If, however, you are interested in how to make car coasters at home, you will need to gather the necessary supplies:
- Blank coasters made from your chosen material OR
- The material to make your coasters (wood, resin, etc.)
You can source these from craft supply stores. At those shops, you will also be able to find other materials for the project, such as:
- Silicone molds
- Cutting tools
- Paints, inks, pigments or dyes
- Sealants or other finishing materials
There are so many types of DIY car coasters you could make - wooden coasters alone have a plethora of design ideas! Take the time to choose the type of coaster you'd like to create and gather the necessary supplies from craft supply stores. They typically carry most of the items you'll need for your project.
Create professional-looking car coasters for functional and aesthetic benefits
Our custom car coasters are available in a range of deluxe materials and can display your custom designs. They are protective and feature a side divot for convenience.
Making Resin Car Coasters
Resin is an excellent material for DIY car coaster projects. It is readily available at craft stores and produces a fantastic finish. Plus, you can customize it in various creative ways. With the right materials to hand, you can follow a simple step-by-step process to achieve great results that are both practical and aesthetically pleasing. Keep reading to learn how to make car coasters using epoxy resin.
Materials
For a DIY car coaster project using resin, you will need the following materials:
- Epoxy resin: Choose a high-quality product optimized for crafting projects.
- Silicone molds: Find some that are the right size for your car’s cup holders.
- Mixing cups and stir sticks: These often come in the kit with your crafting resin.
- Pigments or dyes: Choose the right colors for your design.
- Other aesthetic features: If you want to suspend something in the resin, like a dried flower or some glitter, have it ready.
- Safety gear: You should wear a protective mask and goggles, and nitrile gloves for handling resin.
- Heat gun (optional): This can be useful to remove bubbles from the resin.
With these materials prepared, you are ready for how to make car coasters from resin at home.
Instructions
Work in a well-ventilated area and ensure you have a flat, steady work surface covered with plastic or a disposable tablecloth. Here's how to make resin car coasters at home:
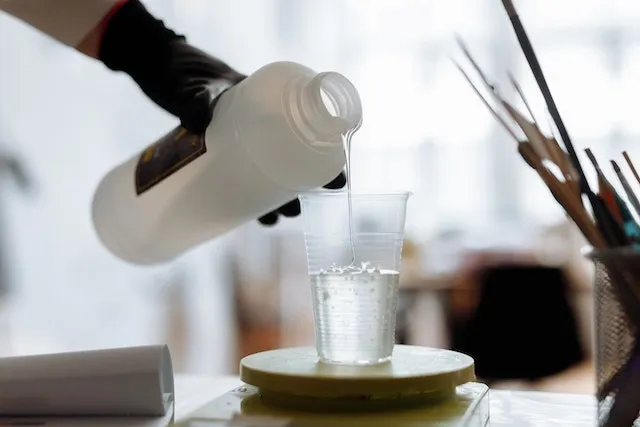
- Mix the resin: Follow the manufacturer's instructions for your resin product, paying close attention to the specific ratio of hardener to resin.
- Add pigments: If desired, you can add pigments or dyes to color the coasters.
- Pour into the molds: Carefully pour the resin into the silicone molds until they reach the desired thickness.
- Add decorative elements: You can gently place these in the resin, or pour a base layer, add the elements, then cover them with the remaining resin.
- Remove air bubbles: Use a heat gun on a low setting to apply heat to the resin surface and eliminate any air bubbles.
- Cure: Follow the designated curing time in the manufacturer's instructions, typically 24-48 hours or longer.
- Demold: Once the resin has fully hardened, gently remove the coasters from the molds.
You now have elegant and durable DIY car coasters to use in your vehicle.

How To Make Pigment Paste
A pigment paste is what you get when you mix pigment powder into your epoxy resin to add color to it. It is important to make the paste correctly for your DIY car coaster project; fortunately, that is fairly straightforward to do.
- Gather materials: You need your epoxy resin kit and your chosen pigment powder(s).
- Mix the resin and hardener: Follow the manufacturer instructions to get the correct ratio.
- Add pigment: The instructions should inform you how much pigment powder you need to add based on the amount or resin you have mixed
- Mix together: As you gradually add the pigment powder to the resin, stir it thoroughly and you will end up with the pigment paste. The more pigment you add, the deeper the shade will be.
- Test it: You should test the pigment paste, which is essentially colored resin, on a disposable surface before using it for your coasters.
Remember that using multiple pigments could lead to unpredictable outcomes.
What Material Is Best For Car Coasters?
Your choice of material for a car coaster depends largely on your needs and aesthetic preferences. There are various good materials that make great car coasters, and we offer them all in our custom coaster service. Popular options include:
- Absorbent stone: Great at catching moisture and made from natural materials.
- Resin: Durable, low-maintenance and highly customizable.
- Fabric-coated: These offer a soft touch and can be tailored to match your car’s interior.
- Rubber: Functional and simple to maintain, these are great if you prioritize practicality over aesthetics.
Remember the importance of coaster maintenance. Cleaning will be important to maintain your coasters, and some materials are easier than others. For instance, learning how to clean cork coasters is a little more complicated than rubber ones. Find the material that has the look and performance for you and go with that.
Need to place a bulk order of high-quality custom car coasters?
Our customized car coasters can be ordered in bulk quantities with generous wholesale discounts. Whether for promotional use or events, we never compromise on quality.
Get startedFrequently Asked Questions About How To Make Car Coasters
What Material Is Best For Car Coasters?
There is no single answer to this question. There are various materials that work very well, so you need to choose one that offers your ideal combination of form and function.
How To Make Car Coaster Sublimation?
Car coaster sublimation requires specialist software and hardware and a heat press. The special inks are converted to gas, quickly pressed into the coaster, then re-solidified for a durable print.